
You want to make storage, but you don't want anyone to see the screw heads.
The ideal is to use trunnions.
Thanks to this technique, accessible even to a beginner DIYer, you can make different types of assemblies: flat, to extend boards, or at an angle, in an “L” or “T” shape.
To discover
February: what vegetables and fruits are in season?
Adjust the correct length of the drill bit
The kit we are presenting to you works with boards from 12 to 30 mm thick.
Here we will use 17 mm boards, 40 mm long dowels, and the corresponding drill bit, 8 mm in diameter.
For a “T” assembly, I start by marking the locations of the future holes on the edge of board 1, respecting a spacing of around ten centimeters.
To correctly place the depth stop on the drill bit, I make the following calculation: length of the dowel - (thickness of the board - 5 mm), i.e. 40 - (17 - 5) = 28 mm, to which I add 2 mm for the glue.
The depth of the holes will therefore be 30 mm.
Place the depth stop on the drill bit.
The Practical Individual.
The necessary tools
To DIY in the best conditions, you will need a drill, a rubber mallet, or a small hammer, and a pair of clamps.
Center the holes correctly
I place the assembly guide astride the edge of board 1, so that it falls on the previously marked drilling marks.
It is designed to stay in place.
I then wedge the drill bit into the 8 mm diameter hole.
I can then make the holes without risking drilling too deep.
It is important to respect the marked marks carefully.
The Practical Individual.
Glue and press in the pins
I place a few drops of wood glue at the bottom of each freshly drilled cavity.
I then present the pins and push them with my finger.
I can also use a rubber mallet or small hammer.
It is possible to use a rubber mallet for this step.
The Practical Individual.
Drill into alignment
I draw a first line on board 2, at the same place where the assembly must be carried out, and a second, respecting a gap of 35 mm.
I position board 1 perfectly, pins forward, on this limit.
I use two clamps to hold the two pieces of wood together.
I can then slide the assembly guide onto a trunnion and center the drill hole on the joint line drawn previously.
I'm thinking of re-adjusting the drill stop to get 12mm deep holes (40 - 28mm).
I just have to break through.
The drill hole should be centered on the joint line.
The Practical Individual.
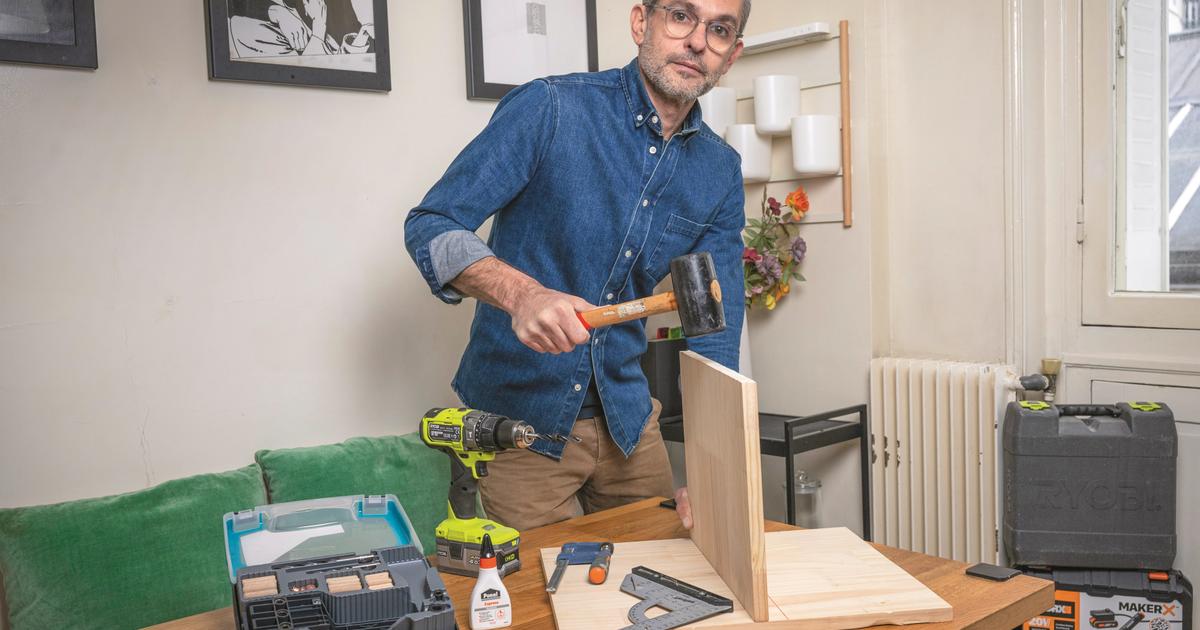
Fit the boards together
I lightly sand the surface of the holes dug on board 2. I can then present board 1 by placing the pins in front of the holes and assemble the two pieces.
A little tap with a mallet can still help to obtain a perfectly perpendicular, solid assembly without traces of screws.
All that remains is to assemble the two boards.
The Practical Individual.
Up to you
Once you have mastered the different assembly techniques, you can easily build small pieces of furniture.
Our opinion
The kit* we used contains everything you need to make the different types of invisible joints, and it requires very few additional tools.
However, we advise you to take the time to read the instructions carefully (it may lack clarity in certain places) and to carry out a few tests before really getting started.
Once this step has been completed, its use is really very simple, intuitive, within the reach of all DIY enthusiasts.
* Wolfcraft 4645000, €32.95.