
Do you want to delimit interior spaces, create new rooms or separate existing areas? Why not opt for the creation of a plasterboard or placo partition on a metal frame, easy to install and at an affordable cost.
To discover
What to plant, sow or harvest in March?
Materials and tools
Making a plasterboard partition on a metal frame is a DIY project that is completely accessible to beginners.
Materials for mounting a placo partition
To mount a partition, select the right materials:
Rails and uprights of metal framing
Peripheral floor strip
Ankles to hit
Insulating
Plasterboards (e.g.: standard gray Placoplatre BA13, water-repellent green Placomarine, blue Phonic Placo, Habito for heavy loads, etc.)
Screws for plasterboards or dowels
Plasterboard joint coating
Acrylic putty cartridge
Good to know
Regardless of the plasterboard chosen, the assembly of the partition is identical.
Useful tools
To mount your partition, you may also need:
Meter, Ruler, Level, Square
Pencil, Cutter
Shear, Saw
Grated
Screwdriver
Hammer
Concrete drill
Hole punch
Once you have these tools together, you will be able to assemble your partition. Don't forget to equip yourself with a dust mask and protective gloves, and to have help throughout the operation.
Read alsoThe essentials for the toolbox
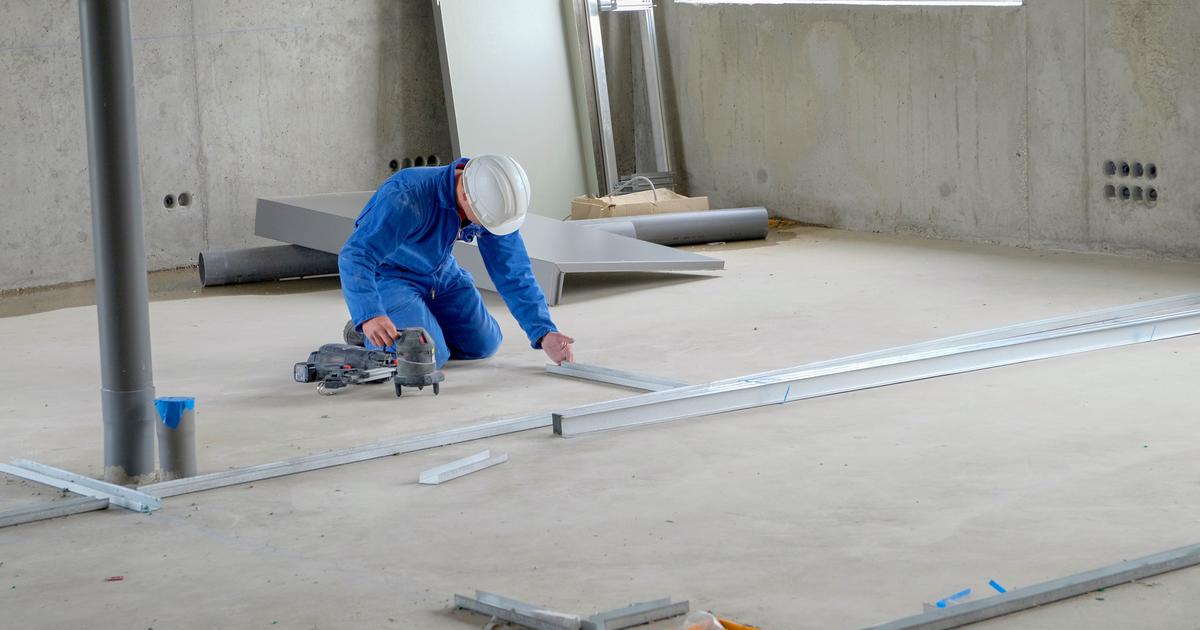
Assemble the metal frame
The first step in installing a plasterboard partition is to install the metal frame.
Locate and trace the position of the partition on the ground, taking into account the location of the door, then trace any returns using a mason's square. Transfer these marks to the wall and ceiling with a level backed by a long ruler, a plumb line or a laser level.
Glue a resilient strip to the floor before attaching the rails. Use screws or dowels suitable for the support, or a gun-type sealant for a concrete slab. Drill approximately every 60 cm and more than 5 centimeters from the edge of the slab, in accordance with the standards of DTU 25.41.
Then measure the height between the floor and the ceiling, then subtract 1.5 centimeters to obtain the length of the upright. Cut the vertical uprights to size. Snap the upright into the bottom rail. Apply it well against the wall flush with the line before fixing it. Place the ceiling rails on top of the studs and screw them in place.
Embed the frame uprights in the rails every 60 cm and check their plumbness with a level. Use crimping pliers to secure them to the rails.
Also read: What is expanding foam?
Lay the plasterboards on the framework
Remember to store the placo in the room where the partition will be mounted for several days before the start of the work, in order to avoid any thermal or hygrometric shock which could damage them. On the big day, cut the plates to the right size and install them by screwing them onto the uprights. Make sure to leave a space of around 1 cm between them and the ground to avoid rising humidity.
To note
If the partition includes a door, cut out the uprights and attach them to either side of the door frame.
Pass the electrical conduits
Here are the different steps for passing electrical conduits into a partition:
For electrical circuits:
Pass the electrical conduits to their distribution point using the holes provided for this purpose on the frame uprights.
To recess electrical boxes:
Use recessed boxes specifically designed for drywall.
For installing sockets and switches:
A hole saw is generally sufficient. Locate the drilling point, make the circular cut with the hole saw, then engage the box through the hole and secure it with screws.
For a junction box:
Trace the shape onto the plate, drill at all four corners, then use a small plaster saw to make the necessary straight cuts.
If electrical work seems complicated to you, hire a professional electrician who will handle this part for you.
Install glass wool for insulation
Standard plasterboard does not provide any particular thermal or acoustic insulation. To improve this performance, you can add insulation to the thickness of the partition, such as:
Glass wool
Rock wool
Hemp wool
From the PES
XPS (extruded polystyrene)
Or wood fiber
Depending on your specific needs, the thickness of the insulation may vary. Usually, for BA13 partitions, a glass wool thickness of 48 mm is used.
Install the last plasterboards
Once the insulation is in place, install the plasterboard on the second side of the partition. To reinforce the rigidity of the structure, be sure to offset the vertical joint in relation to that of the first face. Also make sure to install an acrylic seal around the perimeter of the work to ensure optimal waterproofing.
Finalize with board bonding mortar
Once the plates are in place, move on to the finishing touches:
Fill the gap with acrylic putty at the bottom of the plates to ensure a homogeneous horizontal connection.
Carry out the same operation at the top of the partition, at the edge of the ceiling.
Cover all screw heads with sealant. A second application may be necessary the next day, as the coating tends to shrink slightly. Let dry and sand with 120-grit sandpaper. Dust.
Finalize with mortar to ensure a perfect finish to your placo partition.
If you want to paint, install wallpaper or tile your partition, remember to apply primer so that the surface is uniform and the future covering adheres perfectly.
Installing a plasterboard partition is not complicated, but requires attention to detail and requires carefully following each step. A plasterer or a construction professional will be able to help you.